This Home runs on LOVE

You ever have those days where you just need a drink? Happy Hour can't get here soon enough? I DO!

If you're my Facebook 'friend', "like" asJulesisgoing's FB page, follow me on twitter {@julesrothacher}, or instagram {julesrothacher}, then you know I LOVE me some Sonic Happy Hour {7-9am & 2-4pm 1/2 price drinks and slushes then after 8pm 1/2 price shakes}!!! Vanilla Dr Pepper to be exact. I know, as a Christian we are trained to say, when you're having a bad day you just need to 'press into God' more, study the Bible more, or pray more. I would agree! But God also made this world 'GOOD'. I believe that means He created things like soda to enjoy and He enjoys watching His children enjoy the simple things in life, like a discounted amazing Vanilla Dr Pepper with some really cool tiny cubed ice ;o)

Here's some fun Subway Art I just made and hung in my house:

If your a Sonic lover, here's the FREE PRINTABLE:
This Home runs on LOVE LAUGHTER and lots of SONIC Happy Hour Drinks

I've also found other awesomeness on Pinterest {of course}.

Cherry Limeade Sugar Cookies

Cherry Limeade Cupcakes


Cherry limeade cupcakes inspired by the summer sensation drink at Sonic!

Copycat Recipes: Sonic Drive-In Cherry Limeade Drink Recipe

Am I the only one who loves this joint {even after having Car Hopped there}? Comment and tell me your favorite Sonic drink!

Share Button

Post to Twitter

Shake-a-Shake

I love Pinterest! No, don't leave. This is a new post. I know I say "I love Pinterest!" a lot but it's true. My poor hubs has to ask, "Did you find this on Pinterest?" I always wanna yell, "NO!" in an annoyed creative voice but I can't...I prolly did find it on Pinterest.

Today's Pinterest find:

Yep, we made our own!!!

Supplies:

We put about 10 chick peas into our plastic eggs. We used empty eggs that came with Playdough in them. {Are you supposed to use those eggs as containers for the Playdough? I wouldn't think that would keep them moist enough...?} Then you cut enough tape to wrap around the spoons and egg. Place the egg between two spoons and wrape tape around. You may want to tape the handle end as well.

Test run:

SUCCESS! This set will be part of a birthday present for a little BFF who will be turning 4 on Cinco De Mayo! {shhhhh}

Have you made your own maracas? What did you use? How did they turn out?

Share Button

Post to Twitter

Kid-friendly Valentine’s!

Anyone else get their 1st "LIST" this year?

pen and paper

I did. It was back at Christmas time and my 3-year-old came home from Cubbies with a list of classmates on it. I wasn't sure what this mean. I had volunteered to bring cupcakes. Did this list mean I was to put their names on individual cupcakes for them? Nope. Gifts. For Each Child. That's what it meant. It has begun. Gone were the days of nursery kids and workers being pleasantly surprised by my children offering simple gifts to them for the holiday. Now there was a LIST. Crazy! I guess there's no turning back and no more forgetting...

We made simple gifts with printed tags for Christmas and, now anticipating the LIST for the Valentine's Day party, I was Ready! I'd been clicking through Pinterest for ideas. Not wanting to spend too much money on top of the cupcakes for the this party as well, I finally found something we already had enough of at home, created my own tag on Picnik {entire site FREE and Unlimited until April 19, 2012} using combination of things I'd seen before, and spent ~$3.00 more to get this finished product:

Gold fish! The kid-friendly, semi-healthy snack that we had a GIANT SAM's Club size container of already at home. I bought 1 box of Reese's Pieces ($1.00) and the cheapest plastic bags I could find at Wal-Mart (maybe $2.00). I dumped tons of fish into a bowl and gave my girls measuring spoons to scoop them into the bags I'd opened.

{Some where a bit fuller than others so I evened them out later} They of course were allowed to snack on a few while making their friends gifts. I went back later and added the not as healthy chocolate pieces to the bags. You could of course put more than the ~8 pieces than I did but I was trying to keep it healthier and DID NOT add the chocolate Peanut Butter candies to the bags going to the nursery {Doctors do not want babies under 2-years-old to have peanut butter in case of fatal allergic reactions!}. I folded the bags shut, folded the sides in to keep them fresh, and then stapled the tags on top and bottom to each bag. We wrote each child's name in the top corner and "from ___" in the bottom corner. We also have some blank ones for any visitors that may be there that night.

{You could always punch a hole in the tag and tie the bag shut with some ribbon looped through the tag's hole.}

If you're like me and need a quick Valentine for the LIST you were just handed ---> Here is my FREE Valentine's Day Printable Gift Tags just for YOU!

Do you have any simple kid-friendly DIY Valentine's Day ideas to share!?! Please tell us about it in the comments below!

Share Button

Post to Twitter

Advent {Day 13}: A Rock’n Angel Tree Gift

Yep, Pinterest Inspiration once again!

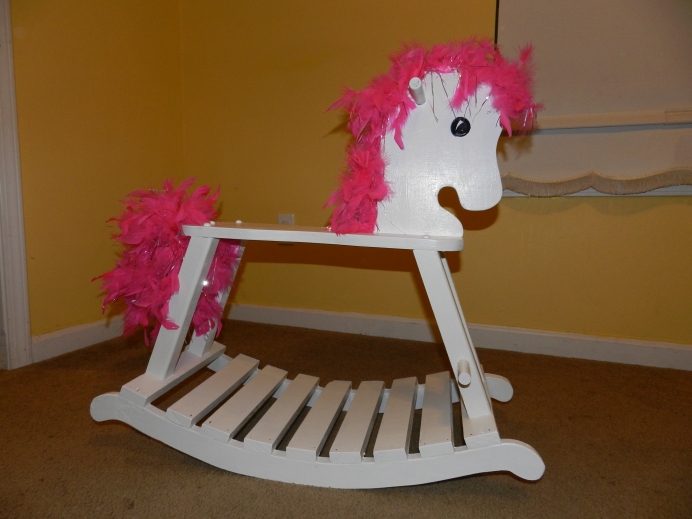
This year one of our Angel Tree children wanted a rocking horse! Not to hard to find, right? We shopped all day, all the while looking at every store for a rocking horse. Did I mention it also needed to be big enough for a 4-year-old who wears size 5T? Yeah...

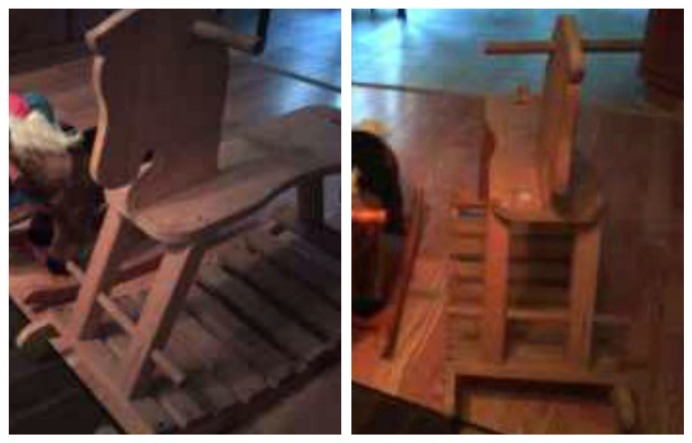
After shopping, we went to pick up our kids from their Nanna's house and I was explaining to my daughter that the only thing we didn't find was a rocking horse for one of our friends. Nanna just said, "That's okay. We can just ask Jesus to help us find one." That night we prayed for Jesus to simply help us find one so we could bless our friend on Christmas day. We tucked in our babes and decided to search Craig's List! SCORE!!! We found several. So the next day we started with the cheapest priced big wooden horse listed. Yep, SCORE! This is the listing picture:

Solid Wood! Still Available! $15.00!!!

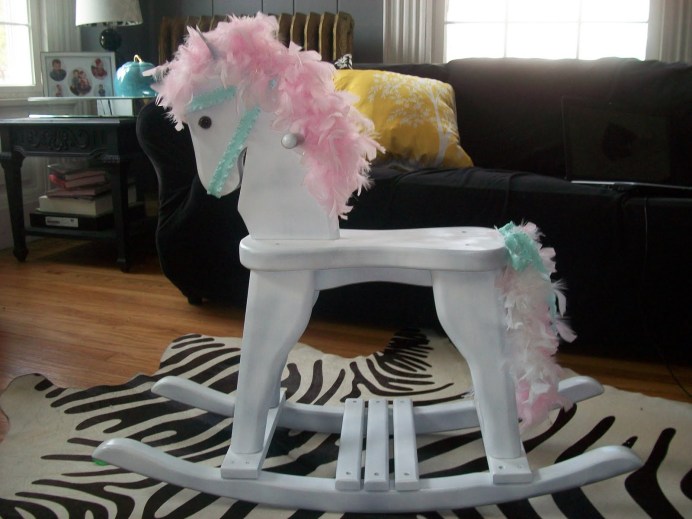
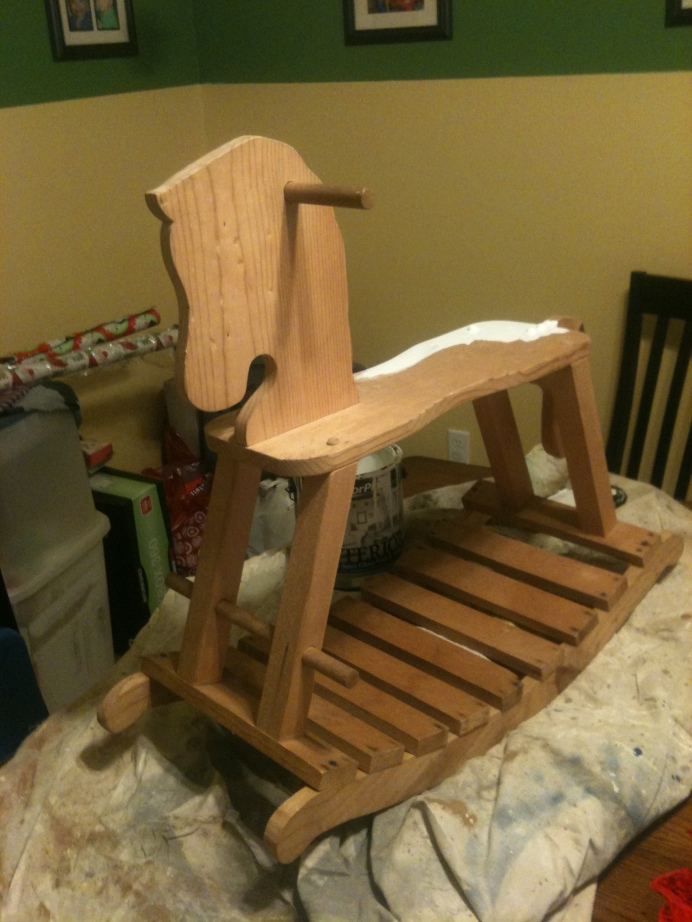
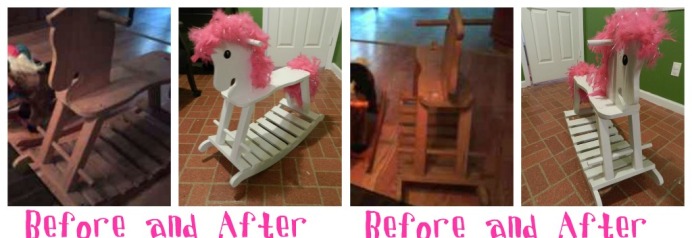
I was so excited my husband was willing to drive ~2 hour round trip to pick up. When he got it home, he painted with some white house paint we had left over. After a second coat the next day we tightened up the screws and I hot glued on a feather bowa I had from a formal in college and Matt painted on her eyes! Walla!!!

Woop Woop! Awesome Christmas gift for $15.00!!!

Have you found any awesome deals this Christmas? Do share!

To read more Rothacher's Advent Days click--->
Advent {Day 1}: Cookie Swap

Advent {Day 2}: Dizzie Izzie's
Advent {Day 3}: Giving Christmas Away
Advent {Day 4}: Homemade Gifts
Advent {Day 5}: HIPPY Christmas Party
Advent {Day 6}: The Fridge 
Advent {Day 7}: Sprinkle Joy @ Home
Advent {Day 8}: UpCycle Gift Wrap
Advent {Day 9}: Sugar Cookies (Gift Ideas Series)
Advent {Day 10}: Snack Mix (Gift Idea Series)
Advent {Day 11}: Relentless Christmas Party
Advent {Day 12}: eBook for ANY Woman! (Gift Idea Series)

Share Button

Post to Twitter

Advent {Day 2}: Dizzie Izzies

As part of Advent we are doing MORE baking:

Hi! My name is Isabella Ruth. Some people Call me Izzie Ru, Izziebella, Iz but most call me Izzie. I will be 2 in January!

I have 2 siblings, a sister 18 months older than me and a brother 2 days shy of being 1 year younger. I love my family! Today was a fun day. Maggie, my big sister, went to our Nanna's house for her "Nanna Day". YAY! That means me and Mommie get to hang out. Shortly after Mags left, J went down for a nap and we started our fun.

Today we decided to make cookies for tonight's cookie swap! We searched through lots of recipes and landed on these:
{we had all the ingredients at home and didn't have to go out to the grocery store}

1st picture is where the recipe we used and the 2nd is the look we were going for.
If you know anything about my mom you know...it didn't turn out exactly like we planned ;o)

Holiday Icebox Cookies: {Renamed "Dizzie Izzie's" by my Mommie}

Ingredients

  • 1 1/2 cups (3 sticks) butter
  • 1 3/4 cups sugar
  • 1 teaspoon salt
  • 2 eggs, plus an extra egg white for "glue"
  • 3 teaspoons pure vanilla extract
  • 5 cups flour, plus more for work surface
  • 2/3 cup milk
  • 1/4 cup cocoa powder
  • Food coloring, in various colors

~~~~~I SUGGEST READING THE DIRECTIONS IN THEIR ENTIRETY FOR BETTER TURN OUTS THAN US~~~~~

Directions
Using the electric mixer, mix the butter and the sugar until creamy. Add the eggs
{we made the mistake of adding the extra egg white--> DO NOT do that! Save it for later.} and the salt, and mix well.
Beat in milk and vanilla.
Add flour a little at a time, mixing it in until all of it has been incorporated.
Let it mix well. Don't be in a rush. Don't forget to scrap the sides of your bowl to incorporate everything.
Grab a drink. Just watch it until it's well blended.

If you're like me, it will get a little messy. Have a towel nearby for cleaning up counter and you will want to wear an apron as well.
{Since we messed up by adding the egg white we tried to make the recipe less sticky by adding an extra cup of flour. If helped but didn't totally fix it. The reviews at the bottom of the recipe says it turned out sticky for some people who hadn't make our mistake so maybe our attempt at fixing it will help you if your dough is a bit sticky}
*We ended up chilled the dough for a long time! {over night to be exact} while we made our back-up cookies for the cookie swap. Find those here.
While {IF} you are waiting for you dough to thicken up by chilling it you can always take care of those babes or other chores you have.
Catch up on your emailing or blog reading!
Go get a pedicure!
When your dough is ready...
Divide the dough into balls, one for each color. We only colored 1/2 with red. But you can do lots of colors or even for chocolate dough, add cocoa (1/4 cup is enough to flavor half a batch). Mix well with electric mixer. For colored dough, start with 1/4 teaspoon food coloring, and mix well. Add more in tiny amounts for darker colors. Gel-paste coloring can be intense, so add it gradually.
Wrap each ball of dough in its own sheet of plastic wrap; pat flat into a rectangle. Refrigerate at least one hour or until ready to use.
Parchment or waxed paper makes a good work surface. Sprinkle generously with flour, then roll out each piece of dough 1/4 to 1/2 inch thick to make the swirls; you can use thicker layers for the bull's-eyes.
Have no idea what this thing was but they suggest using "The bench scraper". They say it "is a good tool for trimming dough's edges to make them even."
We just rolled our 2 colors out when painted on {yet another} egg white as glue. The egg white, brushed on with a pastry brush, will act as a glue, making the layers stick together.
{Sorry, we didn't picture the next few steps. It got a lil crazy. We needed both hands}
The recipe says, "For center, with your hands, roll chocolate dough into a 1/2- to 1 1/2- inch-thick rod; chill 20 minutes. Place rod on edge of rolled-out dough that's been brushed with egg white.
Roll rod inside sheet of dough. Cut the dough where it meets up. Seal by pinching and pressing gently. Chill 20 minutes, then repeat to add other layers. To decorate, go to step 7, or jump to step 8 for plain.
For spirals, measure and trim two or more colors of dough to same size. Brush on egg white, then stack layers. Brush top with egg white. Starting at one end, roll up the dough.
Smooth and straighten the layers as you roll them so there are no gaps, then gently pinch and press the edge of the roll to seal it. Now the dough is ready to decorate."
{We didn't have a "1/2-1 1/2 inch-thick rod and failed to read about how you should chill {again} before laying}
DON'T HAVE A ROD???
After they were rolled out, we picked up the entire red layer and plopped it on top of the entire white layer, attempting to make them as even as we could.
We then trimmed any edges that didn't have a layer of each color.
Now that we had a double-Decker block, we scooped one end up off the counter using a Rachel Ray scrape shovel tool. We used some flour between the scrape shovel and the dough as we scooped it off the counter as we rolled.
We we had one weird looking roll we chopped it into 3 sections {the middle looking the best as opposed to the sprawling end pieces}
Each roll as wrapped in some parchment paper and frozen for a few hours. While you wait you can of course go read a good book or some relaxing activity you enjoy.
When the dough was set we were so ready to bake and eat them we almost forgot to add some toppings.
The original recipe says, "Add your favorite toppings (try coconut, colored sanding sugar, chopped nuts, or chocolate sprinkles): Spread topping in baking sheet, brush dough with egg white, and roll the log in topping."
but if you haven't learned anything about our baking skills, we don't always follow along well.
We started chopping cookies off the logs using the ____ before rolling in sprinkles and we definitely forgot the egg glue.
After quickly dabbing the edges and the tops of the cookies in sprinkles off of a cookie sheet before chunking them on a sprayed pan and baking for about 10min @ 350'.
Here is our cookie turn out:
Not too shabby.
What did you do with those pieces you cut off at the beginning you ask?
Chop them up!!! Yep, chop them and then bake them for ~10min @ 350' as well. This is the cookie version of chips and dip!
You could hand out little bags of these with a can of frosting to friends or just have a bowl of them out at your party with a bowl of frosting next to it! The more colors you have the more festive!
Other helpful hints to help your cookies turn out better than our from the original recipe are: "Roll each log in parchment or waxed paper; twist the ends of the paper closed. To help the logs keep their round shape, set each in a cardboard paper-towel roll that you have sliced open lengthwise.
To remember what colors you have already used, with crayons, draw the designs onto key tags; tie the tags onto the paper covering the logs. Chill logs until they are solid, about 1 1/2 hours.
Cut 15 inches of dental floss (or double thickness of thread). Let log soften for about 10 minutes. Remove parchment. Wrap floss around log and pull through. Make the slices thin: 1/4 inch or less.
Preheat oven to 350 degrees. Place slices on an ungreased baking sheet (lined with parchment paper). A grown-up should bake the cookies 12 to 15 minutes, until firm but not browned. Let cool on baking sheet for several minutes, then transfer to a wire rack."
~~~
Thanks for reading my, Izzie's, 1st baking adventure. Share your failures, successes, or redeemable baking adventures!
To read more Rothacher's Advent Days click--->Advent {Day 1}: Cookie Swap
Share Button
Related Posts Plugin for WordPress, Blogger...

Post to Twitter