This is the fifth year we’ve hosted an Operation Christmas Child Packing Party at The Valley church so we’ve learned a few things each year. I've also done some research via Pinterest and Facebook OCC groups to try to improve our parties each year. From the first year of packing with my kids in my living room to becoming more and more organized, we have grown our passion for this ministry.

I would love to share with you some of thing logistics we've learned.
Collection
We choose to only “officially” collect items the month [5 weeks] before our packing party. Some like to collect all year-long and we are looking into creating a housing space at our building for this but we have several other out reaches we focus on throughout the year.
The week before collection starts, we announce what Operation Christmas Child is, what we will be collecting each week, and when our packing party will be held. We do four main focuses: Hygiene, School Supplies, Accessories, and Toys. The fifth week is a catch-all and that evening is our party.
We also have an OCC info table set up that hopefully answers any questions someone might have as well as provides resources to help get people excited. Of Course, people can bring any items during these weeks, we just try to help narrow the focus. Next to this table we have a collection space designated- the past two years it has been this big blue shipping trunk. Each week we empty it, sorting items into bens.
On the last Sunday of collection, we take inventory and try to spot areas we might be short, comparatively and announce those needs via social media so people can bring them on our catch-all week/Sunday morning of the party.
Prep
Several of us {sometimes me and my children} go through all the bins and take everything we can, out of it’s packaging. If we need to, we open packs of crayons, markers, and colored pencils and divide them up into bags. This not only helps items go further but it also makes sure crayons aren’t melting onto other items in the boxes.
While doing this, we sort even further into gender and age groupings [2-4, 5-9, 10-14] if possible. Bagging things ahead of time helps your party flow better and sets you up for quality assurance.
We have always gone with an assembly line format- folding tables in a long line, filled with sorted items. This year, we added very visible signage using small orange cones wrapped in green garland with wording printed on cardstock and taped to paint stir sticks sticking out of them. These were placed at the beginning of each category to help make sure those packing packed items from each section.
I spoke with several others to make sure I was thinking through everything and we decided on a flow and through items we would need to help that layout work.


Layout
We chose to set up in our main room so we thought through making the experience flow in a giant circle. We had stations that everyone worked through to make sure we covered everything.
FOOD
You can’t have a party without food, right!? We set up a small pot-luck along one wall with eating tables right next to them. This is a separate space from packing, even if in the same room, because we don’t want to send crumbs with our boxes of awesomeness.
PHOTO BOOTH
We LOVE sending pictures with our boxes so we hired a friend to run a photo booth for us. This is at the beginning of the layout because we ask that everyone take a picture Before they start packing to give the printers time to print them while they load items.
PACKING
Our long line of tables full of goodies was broken into the same categories as the collections weeks but with a couple added sections with the essentials at the start: boxes, labels [tape and markers for selection and attaching], hygiene, school supplies, accessories, WOW items, and filler toys.
NOTE/PRAYER
We set up separate tables on the opposite wall from the food full of writing utensils, specialized postcards, blank printed info pages, blank Christmas cards, and stickers.
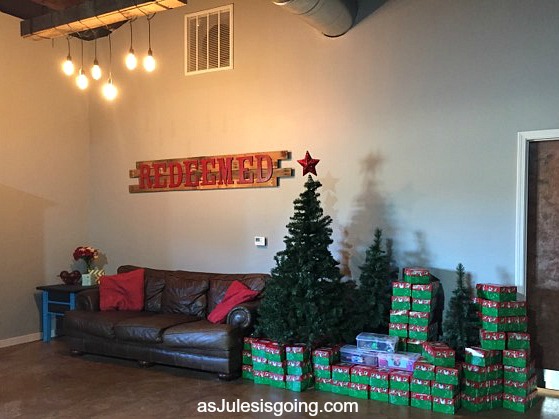
DROP OFF
We designated the wall near these tables for drop-off and had signs hung to help sort boxes by age and gender so we could see which needed more as we went.
Start again

PARTY
FOOD
You can’t have a party without food, right!? We set up a small pot-luck along one wall with eating tables right next to them. We had a group from our local drop-off location come to share with us about the process after we pack boxes. Everyone finished up eating while they shared.
PHOTO BOOTH
We LOVE sending pictures with our boxes so we hired a friend to run a photo booth for us. This is at the beginning of the layout because we ask that everyone take a picture Before they start packing to give the printers time to print them while they load items.
PACKING
Our long line of tables full of goodies was broken into the same categories as the collections weeks but with a couple added sections with the essentials at the start: boxes, labels [tape and markers for selection and attaching], hygiene, school supplies, accessories, WOW items, and filler toys.
NOTE/PRAYER
We set up separate tables on the opposite wall from the food full of writing utensils, specialized postcards, blank printed info pages, blank Christmas cards, and stickers.
Follow Up
We have invited any family that would like to join us, to deliver the boxes to our local drop off location and we've also complete 2 different tracking labels so we can learn where our boxes went, pray for them. Most boxes have addresses in them in hopes of building relationships with ministries dispensing and or individuals receiving boxes.
I hope this was helpful. I'd love to hear about your passion of OCC, how you pack, and maybe even how you follow-up to enjoy this passion all year-long.

![]()


Speak Your Mind